


How to Calibrate Laboratory Equipment with Test Weights: A Step-by-Step Guide
Calibrating instruments with test weights is a fundamental and vital practice in settings like research labs, quality control departments, the industrial sector, pharmaceuticals, and educational settings. Whether you are using balances, scales, or other precision instruments, the impact of environmental and mechanical factors can not be underestimated. Wear and tear caused by prolonged use significantly affect precision and accuracy. Consequently, it is essential to calibrate instruments using test weights to avoid errors and maintain compliance with industry standards.
In this guide, we’ll walk through the step-by-step process of calibrating your lab equipment using high-quality test weights.
Step-by-Step Guide to Calibrating Lab Equipment with Test Weights
Step 1: Gather the Necessary Tools
Before starting the calibration process, ensure that you have all the required tools present. The essential tools include:
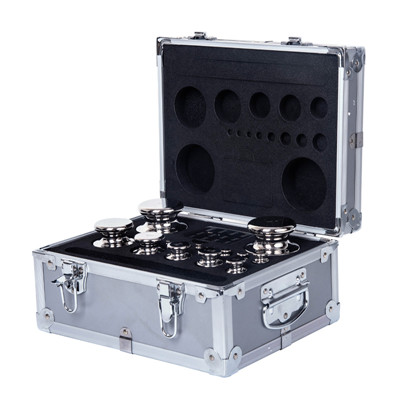
• Certified test weights ( W & J Instruments provides high-quality reliable test weights for guaranteed accuracy)
• A stable and clean work surface
• The Manufacturer-provided instructions manual for the specific instrument
• Protective gloves
• A calibration logbook so you can document and record the results
Step 2: Prepare the Equipment
• Clean the balance or scale: Clean the balance with a dry, clean cloth or a soft brush to remove any dust or residue.
• Level the Instrument: Make sure the balance or scale is completely horizontal without any deviation.
• Warm up the equipment: Before starting the calibration, turn on the device for at least 30 minutes (more or less according to the manufacturer guidelines). This will stabilize the components and ensure an accurate measurement.
Step 3: Tare the Instrument
• Ensure the weighing pan is empty and clean.
• Press the “tare or zero button” to delete any previous readings and reset the display to zero.
• Make sure the display reading is stable without any fluctuations.
Step 4: Select the Appropriate Test Weights
Choose test weights according to the capacity and resolution of the instrument. For example:
• Do not use a test weight that is more than 200 g for a balance with a capacity of 200g.
W & J instruments provide a wide range of appropriate and reliable test weights for precise calibration.
Step 5: Start Calibration with Test Weights
• Carefully place the test weight in the center of the weighing pan. Avoid dropping or sliding the test weight.
• Wait for the reading to stabilize, and record the displayed value. Compare the value with the expected results or the actual capacity of the test weight.
• For example, if you are using a test weight of 200g, compare the displayed value with 200 and record any deviation.
• Record all measurements in your logbook.
Step 6: Check Multiple Weight Points
For a distinct calibration of high-precision instruments, perform the test at multiple weight points, such as at 25%, 50%, & 100%.
• Start with the lightest weight. For example, If you are calibrating a scale of 200g, start with a 50g test weight.
• Gradually increase the weight and perform the test with 100g and then with a 200g test weight.
• Note any deviation from the expected value at each point and record it.
Step 7: Adjust Calibration (if necessary)
If the measurements are inconsistent with the manufacturer’s acceptable range, the instrument may need adjustment. There are two types of calibration:
• Internal calibration and
• External or manual calibration.
Refer to the instruction manual by the manufacturer to inspect the type and steps of calibration for your specific instruments. Some modern instruments have built-in calibration systems that can be activated through the menu. Repeat the tests after adjustment to confirm the accuracy, and label the instrument with the calibration date and the next due date.
Test weights from W & J Instruments can be used for external calibration of the mechanical scales and balances.
Step 8: Documentation
Documentation of all the processes in your logbook is necessary for record keeping, traceability, and audits. The calibration data should include:
• Time and date of the calibration.
• Test weights used with their capacity, serial numbers, and manufacturer details.
• Document environmental conditions like temperature and humidity.
• Record the measured values and any deviations.
• Document any adjustments made.
Common Mistakes to Avoid
Some of the common calibration mistakes are listed here so that you can avoid them:
• Using Uncertified Weights: Using uncertified weights is a crucial mistake, as it can lead to inaccurate results. The use of high-quality test weights like those from W & J Instruments ensures high precision and accuracy in the calibration process.
• Handling Weights Improperly: Avoid handling the test weights with bare hands. Always use gloves because oil and dust from the hand can alter the weight. Store your test weights carefully in protective cases to minimize damage-related errors.
• Ignoring Environmental Factors: Calibrate the weights in a draft-free environment with a controlled temperature and humidity. Since air current, temperature, and humidity can affect the readings.
• Skipping Regular Calibration: Calibration should be performed regularly according to the manufacturer’s recommended schedule. Equipment drifts over time, and it is essential to restore its accuracy. Always label the instrument with the next due date for calibration.
Conclusion:
Calibrating your laboratory equipment with test weights is a critical process for maintaining accuracy and compliance. Scales and balances drift over time due to mechanical and environmental factors, causing discrepancies in the measurements. By following this step-by-step guide for calibration and using high-quality test weights, you’ll ensure your lab balances continue to deliver reliable results. However, you need to calibrate your instruments regularly according to the recommended schedule. Consistency in calibration improves and ensures your accuracy. It increases the efficiency and reliability of your work, whether in a lab, an industry, or a commercial setting.
Now you know the importance of calibration; it is also crucial to select high-quality test weights for your calibration. W & J Instruments provides stainless steel and brass-made test weights that are highly precise and durable. W & J Instruments offers competitive pricing and fast delivery. Moreover, you get expert customer support for your calibration-related issues.


We also provide customized electronic balances/ laboratory scales with special functions according to customer needs.
PRODUCTS
If you have any question, please contact us.
Tel: 0086-(0)519-85286336
Mobile: 0086-136 0612 1307
E-mail: weighinginstru@gmail.com
Wechat/Whatsapp: 0086-136 0612 1307
Add: Huayuan Road, Mudu Town, Jiangsu Province, PRC