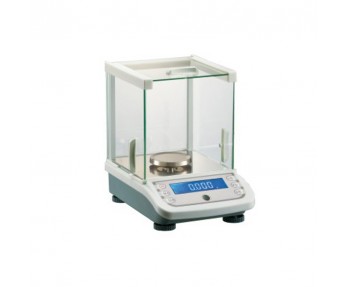
The balance is the oldest measuring instrument for weighing the quality of objects. It has been in existence for more than 4,000 years and has evolved from simple to complex, from low accuracy to high accuracy. According to the structural principle of the balance, the balance can be divided into four categories: torsion balances, hydrostatic balances, lever balances and electronic balances.
As the most basic equipment for weighing in the microbial testing laboratory, the balance should be selected according to the difference between the weighing object and the weighing accuracy requirements, and the balance of the laboratory should be used to balance the weight of the object. Electronic balance. Compared with mechanical balances, electronic balances in the laboratory have the characteristics of accurate weighing, frequent display and fast and clear display. They also have functions such as calibration, digital display, automatic peeling, automatic data output and automatic fault inquiry. Depending on the accuracy, electronic balances can be divided into the following categories:
(1) Ultra-micro electronic balance
The maximum weighing of ultra-micro electronic balances is 2g~5g, and the scale division value is less than (maximum) weighing 10-6.
(2) Trace electronic balance
The weighing of microelectronic balances is generally between 3g and 50g, and the indexing value is less than 10-5 of the (maximum) weighing.
(3) Semi-micro electronic balance
The semi-micro electronic balance is generally weighed from 20g to 100g, and its division value is less than 10-5 of the (maximum) weighing, such as 0.01g electronic laboratory scales.
(4) Constant electronic balance
The maximum weighing of a constant electronic balance is generally between 100g and 200g, and its indexing value is less than 10-5 of the (maximum) weighing.
Method of operation
1. Preparation before use
Place the balance on a stable work surface free of vibration, airflow, direct sunlight and severe temperature fluctuations. Install the weighing pan to adjust the leveling feet so that the blisters are at the center of the level. Before turning on the power, please confirm whether the local AC voltage is consistent with the voltage required by the balance. In order to obtain accurate weighing results, the balance must be warmed up for at least 30 seconds before reaching the working temperature before weighing.

Laboratory Balance
2. Boot
When the weighing plate is empty and the button is pressed, the balance displays the self-test (all fields of the display are lighted for a short time) and displays the balance model. When the balance shows zero return, it can be weighed. If you encounter various function keys and cannot recover, you can restore the factory settings by rebooting.
3. Weighing
After the balance is calibrated, it can be weighed. When weighing, wait until the “â—‹” mark in the lower left corner of the display is extinguished before reading. When weighing, the object to be tested must be handled gently and ensure that the balance is not overloaded, so as not to damage the balance sensor.
Cleared: When the balance is empty, if the display shows that it is not in the zero state, press the button to make the balance display zero before normal weighing can be performed.
Peeling: Small particles and liquids are required to be used in weighing. The container can be placed on the weighing pan, the button is pressed to return the balance to zero, and then the container and the object to be weighed are placed on the weighing pan, and the result of the balance display is the net weight of the above-mentioned object to be weighed.
4. Shutdown
Make sure that the weighing plate is pressed after the empty load. If the laboratory balance is not used for a long time, please unplug the power plug.